Steps to Import Fixed Assets in ERPNext
By Bright Lartey on February 3, 2026
IntermediateStep 1: Confirm Prerequisites in ERPNext
Before importing any fixed asset, ensure that your ERPNext environment is properly configured.
Verify that the Company is created and active.
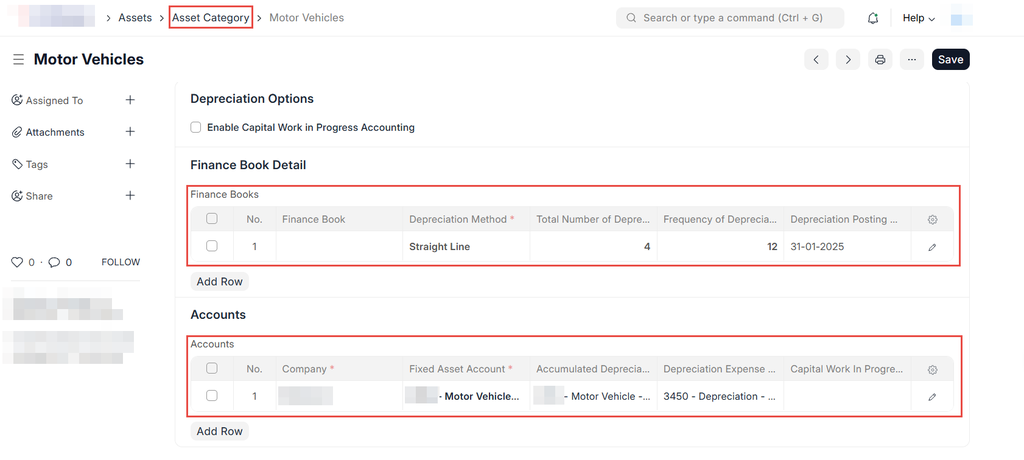
Ensure your Chart of Accounts is fully set up, especially:
- Fixed Asset Account
- Accumulated Depreciation Account
- Depreciation Expense Account
Confirm that Asset Categories are already created with correct depreciation settings, including useful life, depreciation method, and frequency.
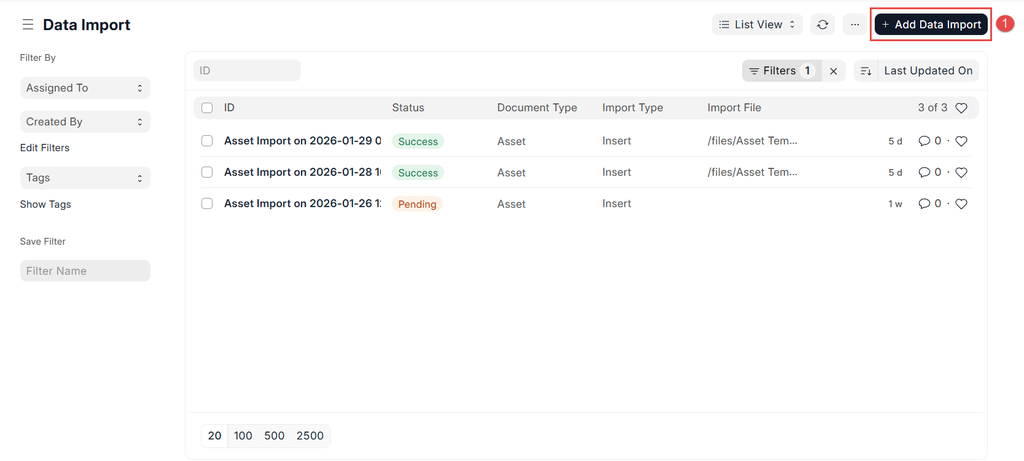
Step 2: Navigate to the Data Import Tool
From the ERPNext Desk, go to:
Settings → Data Import
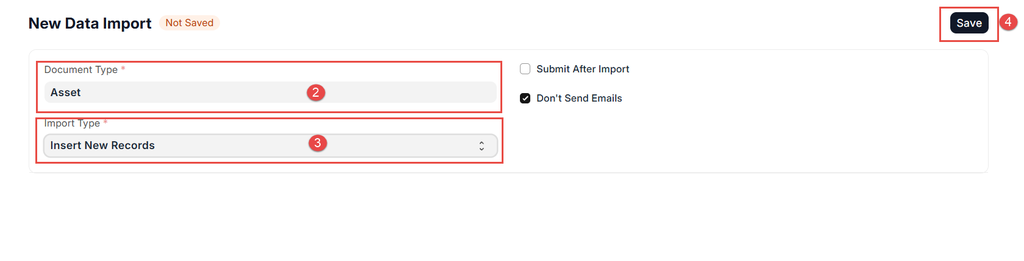
Select Asset as the document type and choose Import Type: Insert New Records.
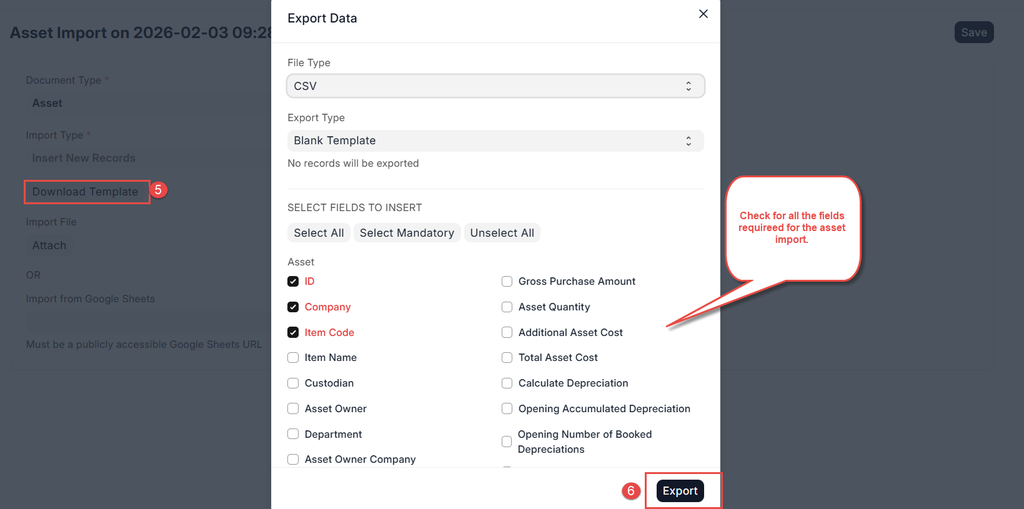
Step 3: Download the Asset Import Template
Click on Download Template to obtain the Excel or CSV file used for importing assets.
Open the template and review the available fields carefully.
Step 4: Fill in the Asset Import Template
Enter asset details in the template. Ensure accuracy for all mandatory fields, including:
- Asset Name
- Company
- Asset Category
- Purchase Date
- Available for Use Date
- Gross Purchase Amount
If the asset already has depreciation recorded outside ERPNext, also fill in:
- Opening Accumulated Depreciation
- Number of Depreciation Periods Booked
Save the completed file in the required format.
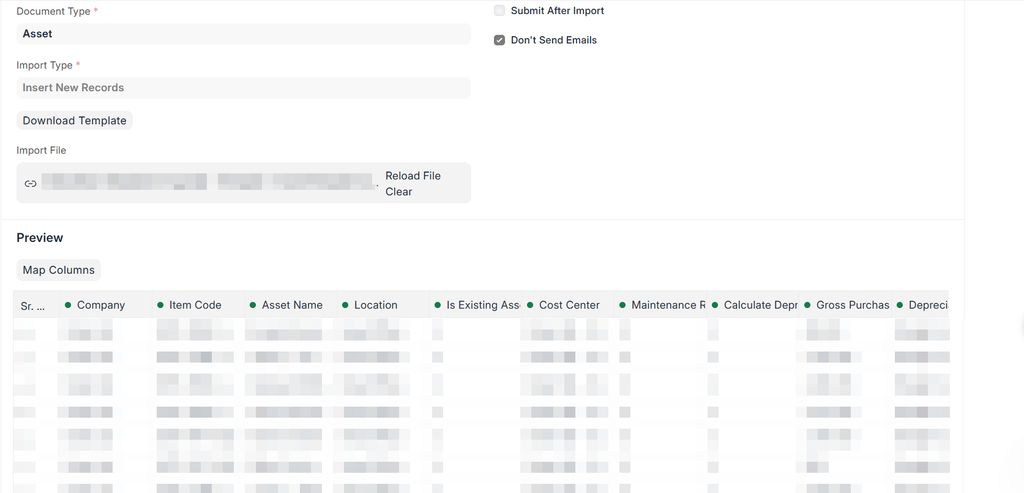
Step 5: Upload the Completed Template
Return to the Data Import screen and upload the completed file.
Click Upload to load the data into ERPNext for validation.
📸 Screenshot: Uploading Asset import file in Data Import
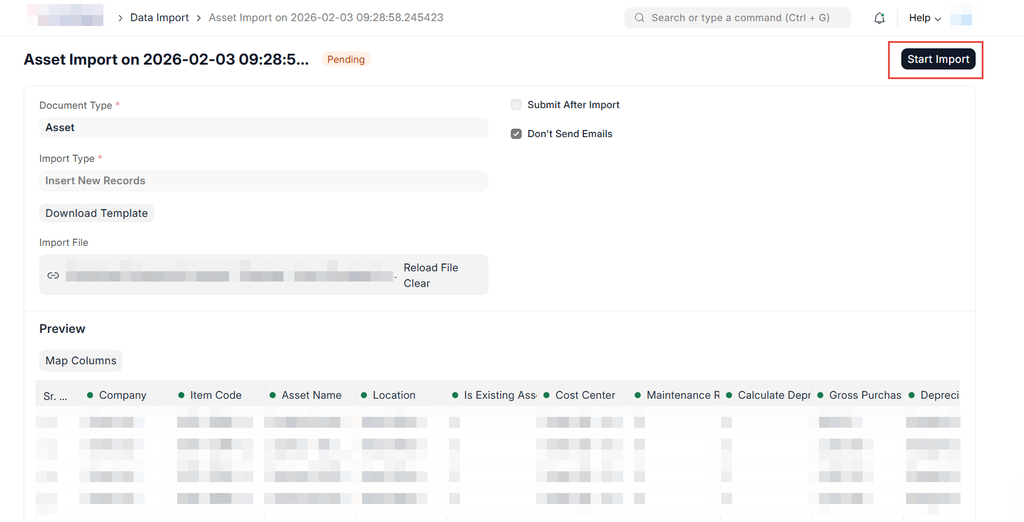
Step 6: Validate the Import Data
Click on Attach to allow ERPNext to check the data.
Review any validation errors displayed and correct them in the template if necessary, then re-upload.
Step 7: Import the Assets
Once validation is successful, click Start Import to complete the import process.
ERPNext will create Asset records based on the uploaded data.
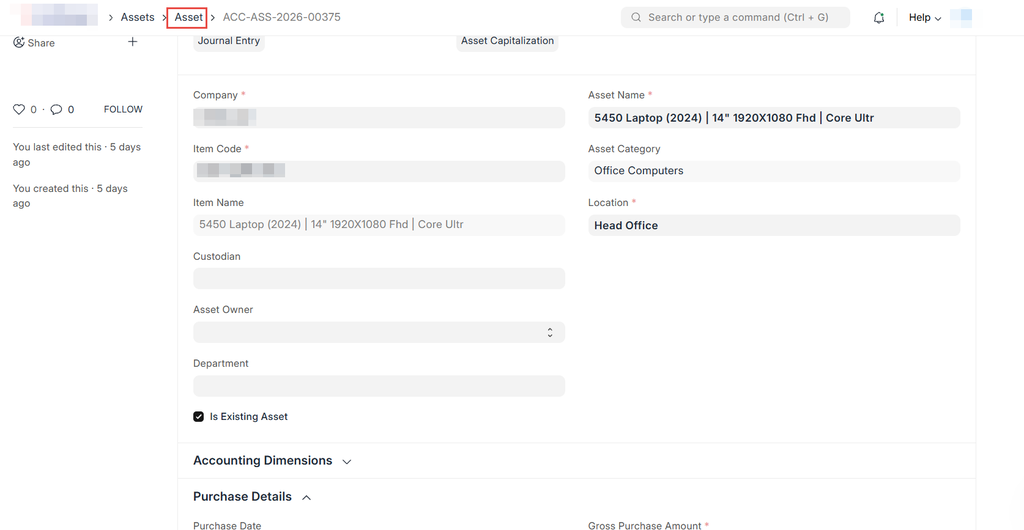
Step 8: Review Imported Assets
Navigate to:
Assets → Asset List
Open a few imported assets to verify:
- Asset value
- Depreciation schedule
- Asset category
- Dates and accounts
Step 9: Submit the Assets
If the assets were imported in draft status, submit each asset after review.
Submitting the asset enables depreciation and accounting entries as configured.
Step 10: Confirm Accounting Impact
Go to the General Ledger and Fixed Asset Register reports to confirm that asset values and depreciation are correctly reflected.
If this is a system migration, ensure totals match the opening balances from the previous system.
No comments yet. Login to start a new discussion Start a new discussion