How to import Accounts in ERPNext.
By Aylmer Ametewee on December 13, 2024
BeginnerImporting accounts in ERPNext is a streamlined process that enables users to efficiently migrate financial data from external sources into the ERPNext system. This guide provides a step-by-step walkthrough on preparing your data, using the Data Import Tool, and ensuring a smooth transition of your accounts to facilitate seamless financial management and reporting. Below are the step:
- Search for "Account List" in the global search bar and select it.
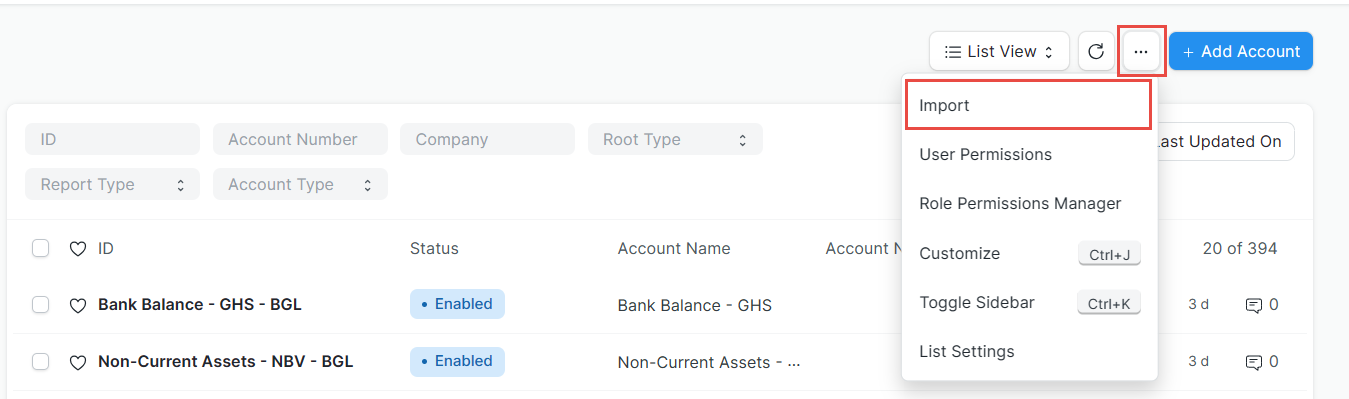
- Click on the 3 dots on the left side of "+ Add Account" and click on "Import".
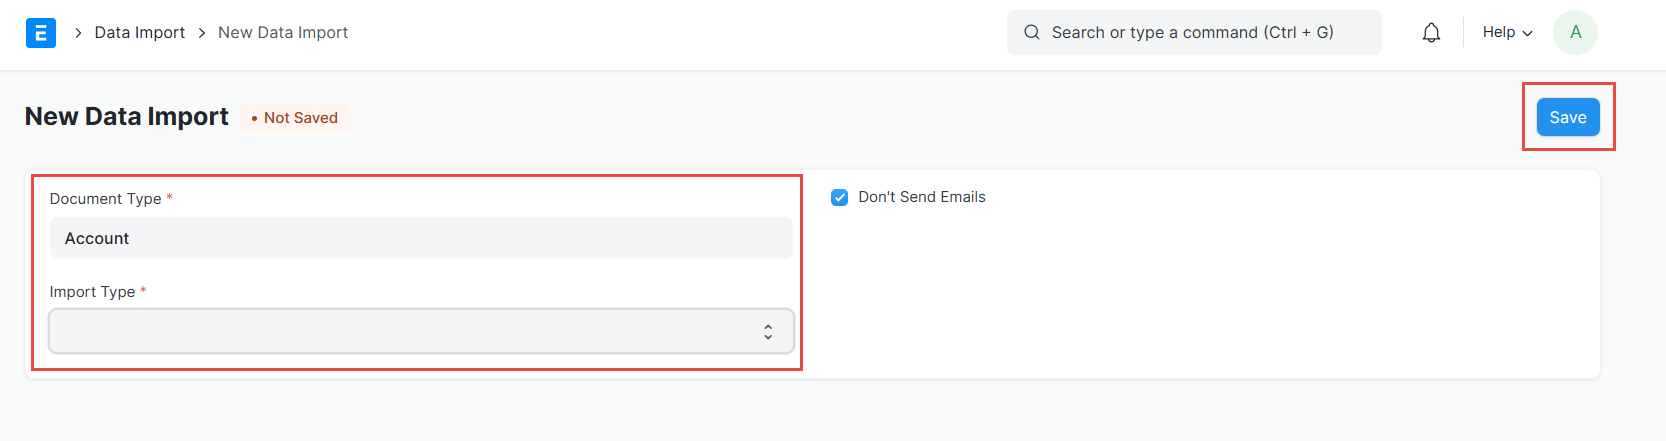
- Click on "+ Add Data Import" and make sure the Document Type is "Account" and select the import type.
- Select "Insert New Records" if you are importing whole new accounts.
- Select "Update Existing Records" if you want to change/update some details in the already existing accounts.
- Click "Save".
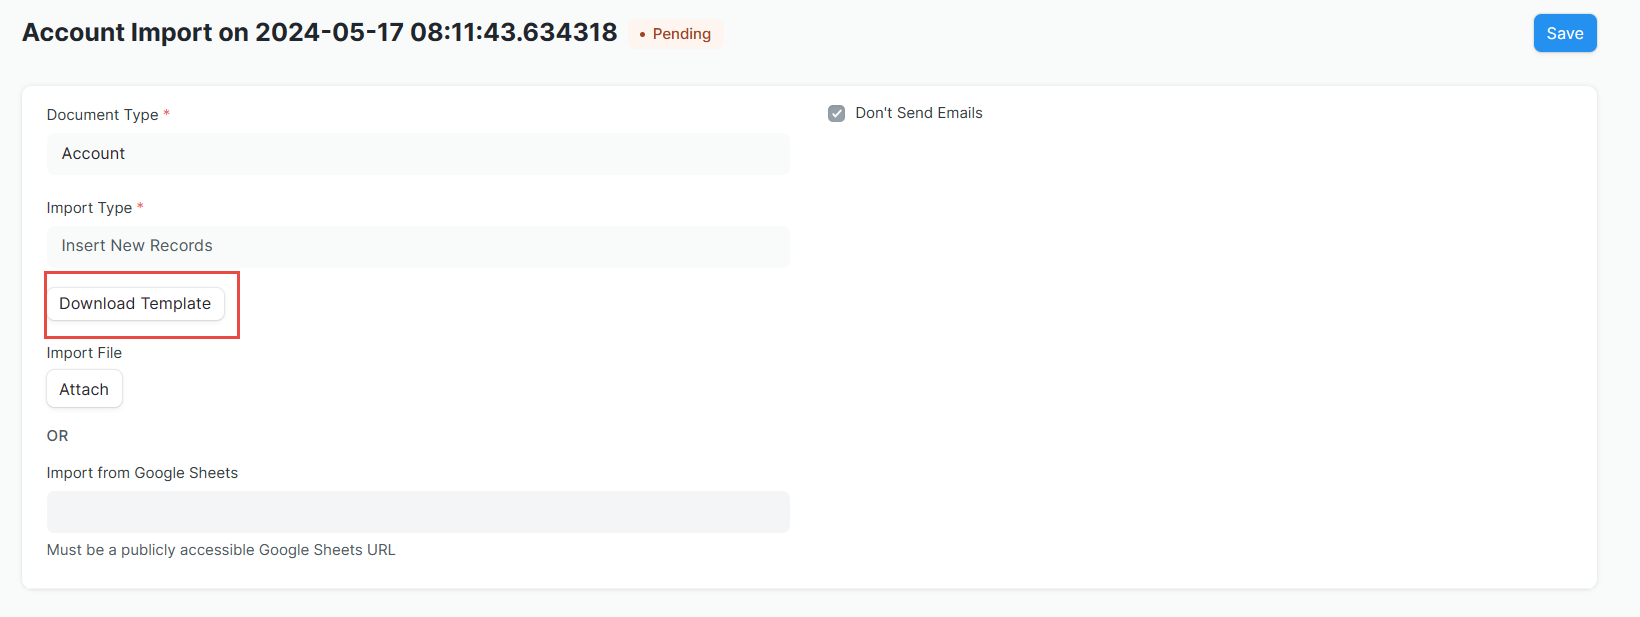
- Click on "Download Template" to get an acceptable import template for ERPNext.
- Tick all the fields that you would to have in the system.
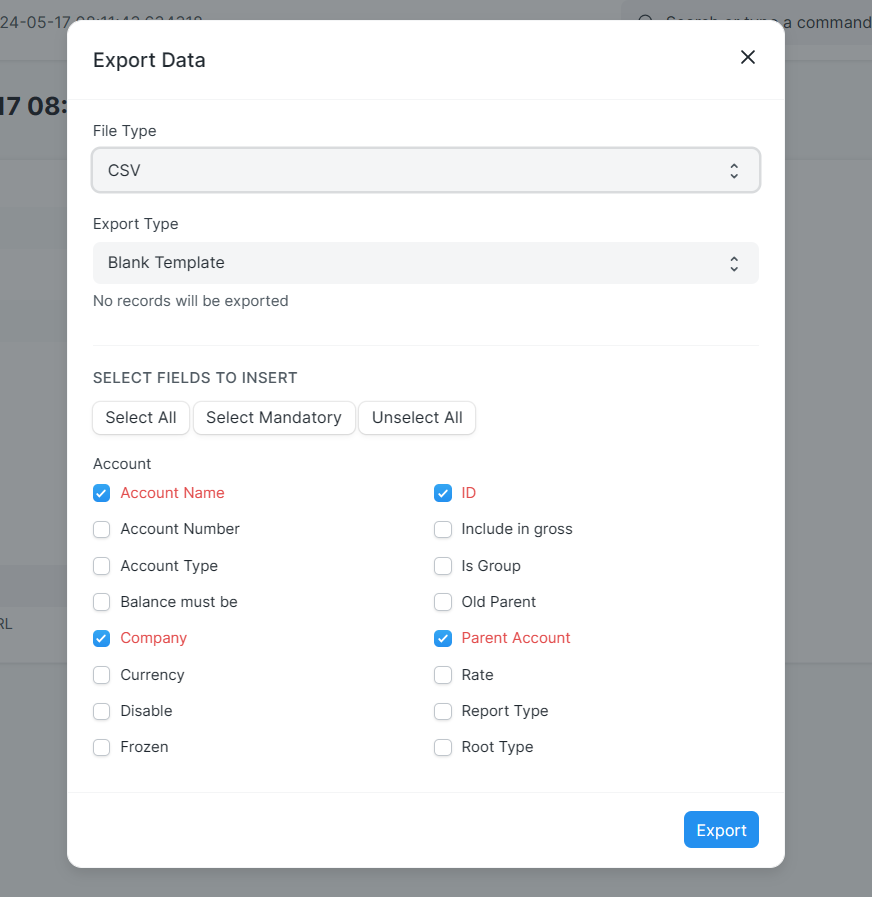
- Click "Export".
An Excel or CSV file will be exported per your selection for you to fill it accordingly, after filling it, you will click on "Attach", and select the file from your computer by clicking on "My Device" and clicking on "Upload" after selecting the file.
As shown in the image below, if your Excel or CSV file is well prepared, there's going to be no failure prompt then you can proceed to click on "Import".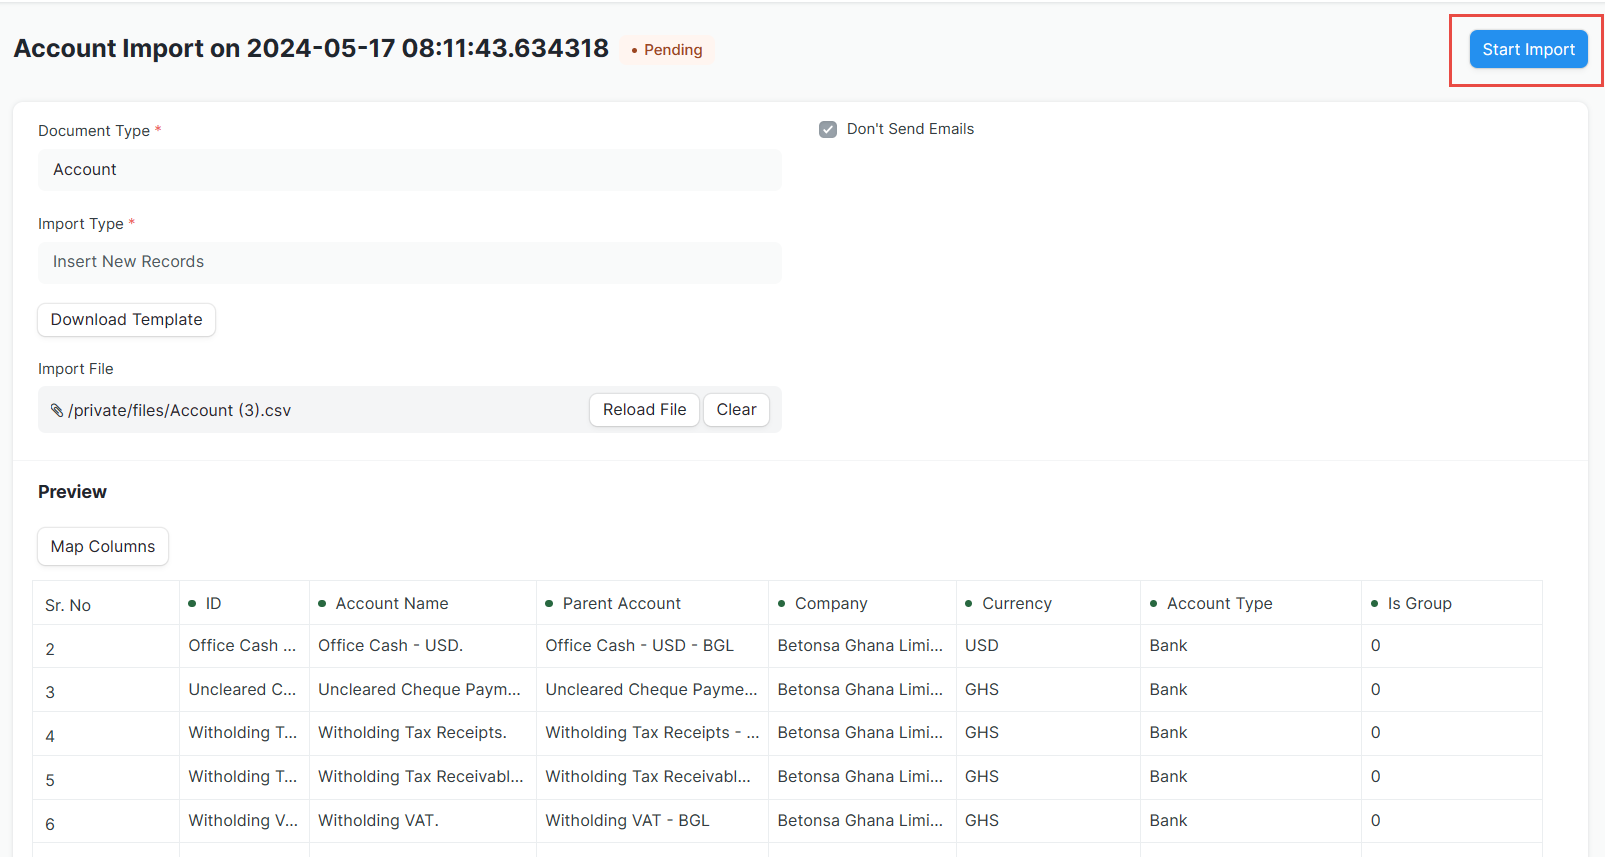
I hope this was helpful.
More articles on Erpnext