How to Create an Asset
By Bright Lartey on January 19, 2026
ExpertHow to Create an Asset
Purpose
This guide explains, step by step, how to create and manage an Asset in ERPNext, from setup to capitalization and depreciation. It is written for accountants, finance officers, and ERPNext administrators.
1. Prerequisites (Before You Create an Asset)
Before creating an asset, ensure the following are properly configured:
- The company is created and set as the default
- Chart of Accounts is properly set up
- Asset Categories are created
- Item is configured as a Fixed Asset
- Relevant accounts (Finance Book, Asset Account, Accumulated Depreciation, and Depreciation Expense) exist
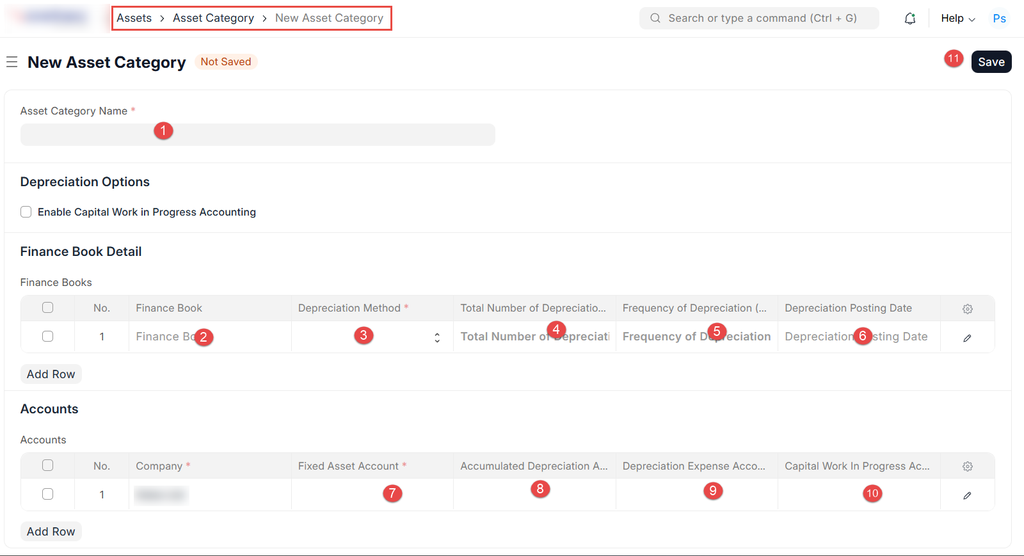
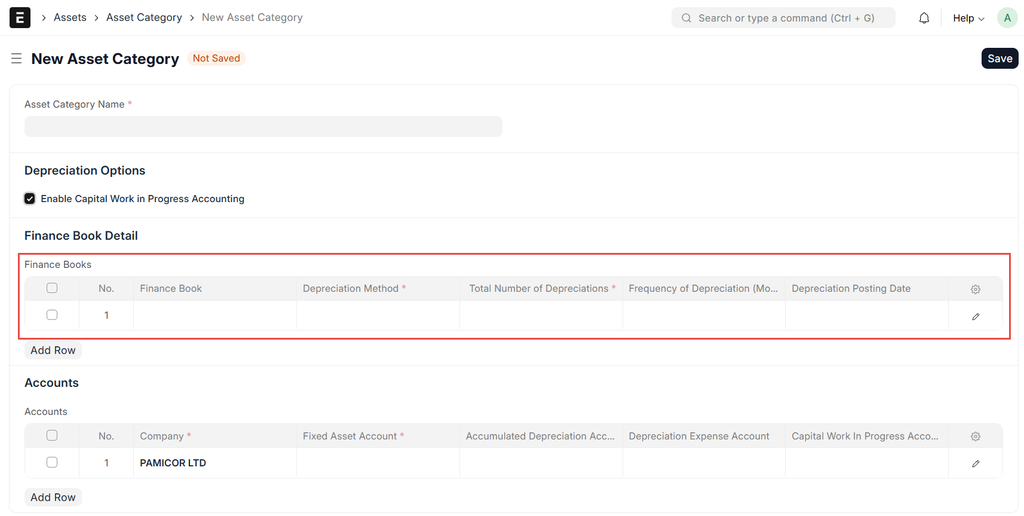
2. Create an Asset Category
Asset Categories define how assets behave, including depreciation rules.
Steps:
- Go to Asset → Asset Category
- Click New
- Enter the following:
- Asset Category Name (e.g. Office Equipment)
- Depreciation Method (Straight Line, Reducing Balance, etc.)
- Total Number of Depreciations
- Frequency of Depreciation (Monthly, Yearly)
- Under Accounts, set:
- Fixed Asset Account
- Accumulated Depreciation Account
- Depreciation Expense Account
- Save
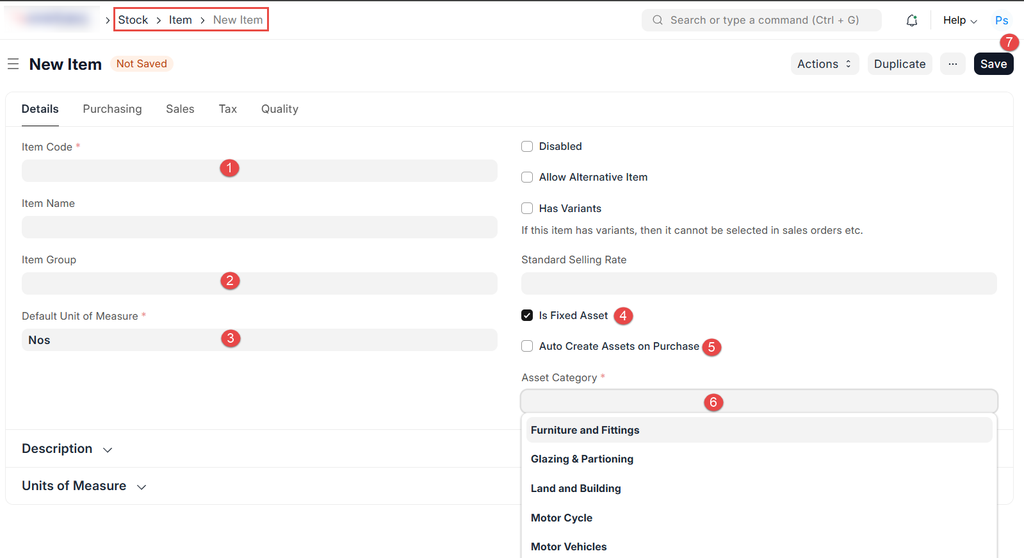
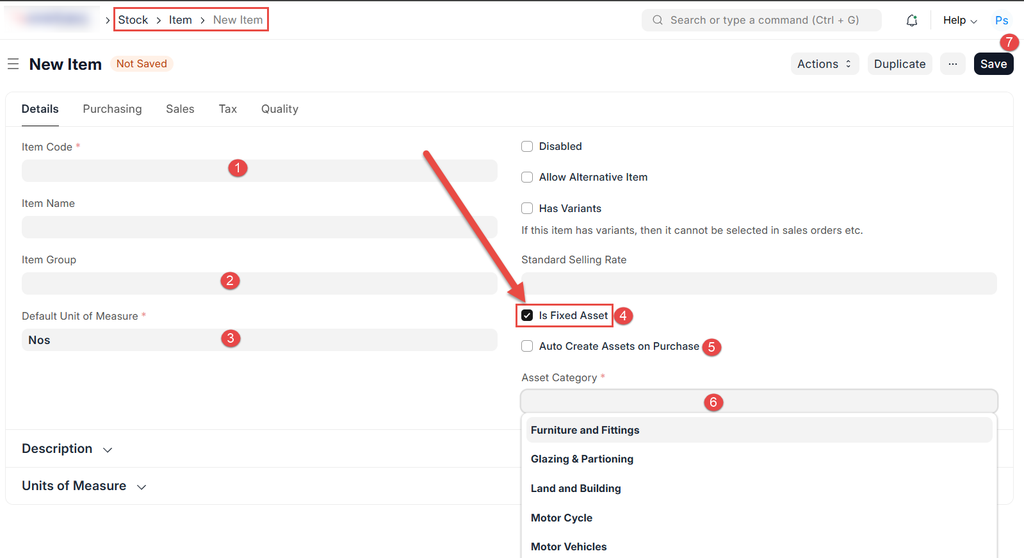
3. (Optional) Create an Item as a Fixed Asset
If your organisation purchases assets via Purchase Invoices, the Item must be marked as a Fixed Asset.
Steps:
- Go to Stock → Item
- Create or open an Item
- Enable:
- Is Fixed Asset
- Set:
- Asset Category
- Asset Naming Series (optional)
- Save
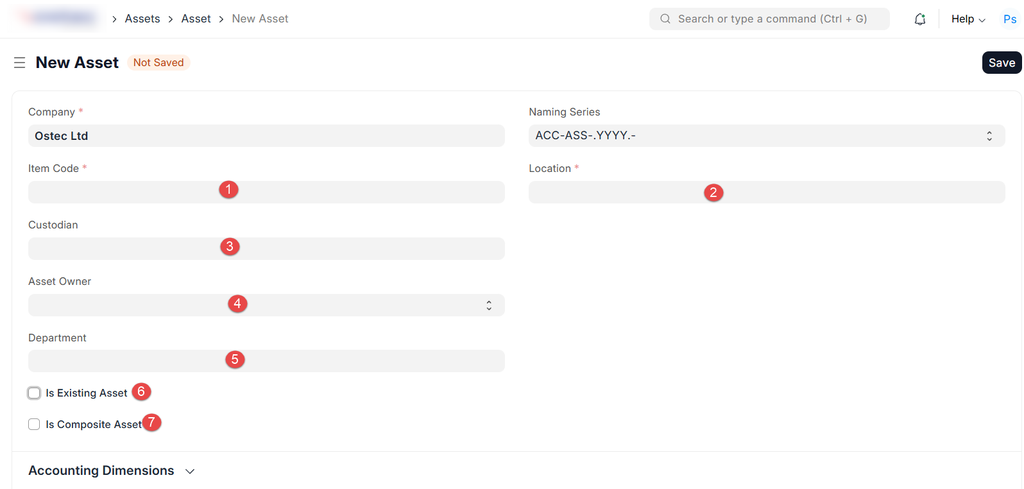
4. Create an Asset Manually
Steps:
- Go to Asset → Asset
- Click New
- Fill in the following details:
Asset Details
- Asset Name
- Item Code
- Asset Category
- Asset Owner
- Is Existing Asset
- Is Composite Asset (if it forms a part of an asset)
- Company
- Purchase Date
- Available for Use Date
- Location (optional)
- Custodian (employee responsible)
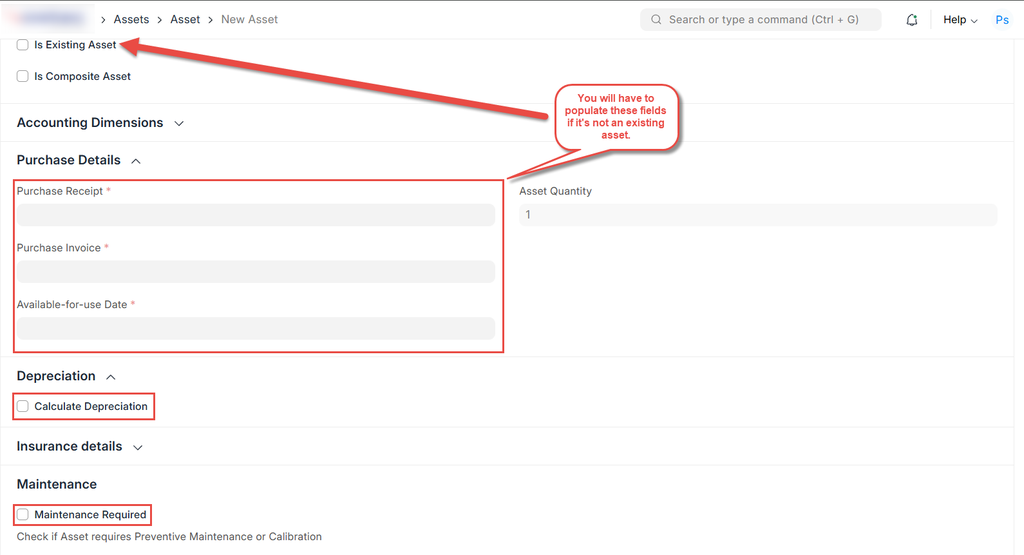
5. Set Asset Value
A. Purchased Asset
- Enable Is Existing Asset if already owned
- Enter:
- Gross Purchase Amount
- Purchase Receipt / Invoice Reference (if applicable)
B. Existing Asset (Opening Balance)
- Enable Is Existing Asset
- Enter:
- Opening Accumulated Depreciation
- Opening Number of Depreciations
6. Configure Depreciation Schedule
ERPNext automatically generates the depreciation schedule based on the Asset Category.
Review:
- Depreciation Method
- Number of Depreciations
- Frequency
- Depreciation Start Date
You may edit individual rows if needed.
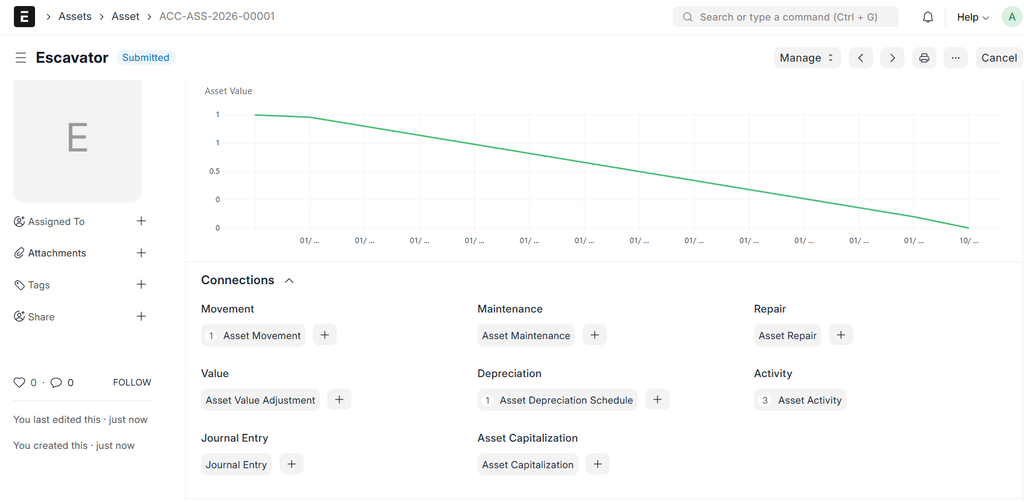
7. Save and Submit the Asset
- Click Save
- Review all details
- Click Submit
Once submitted:
- Asset is capitalised
- Depreciation entries will be posted automatically on schedule
8. Creating Assets via Purchase Invoice (Recommended)
Steps:
- Create a Purchase Invoice
- Select an Item marked as Fixed Asset
- Submit the Purchase Invoice
ERPNext will automatically:
- Create the Asset
- Link it to the Purchase Invoice
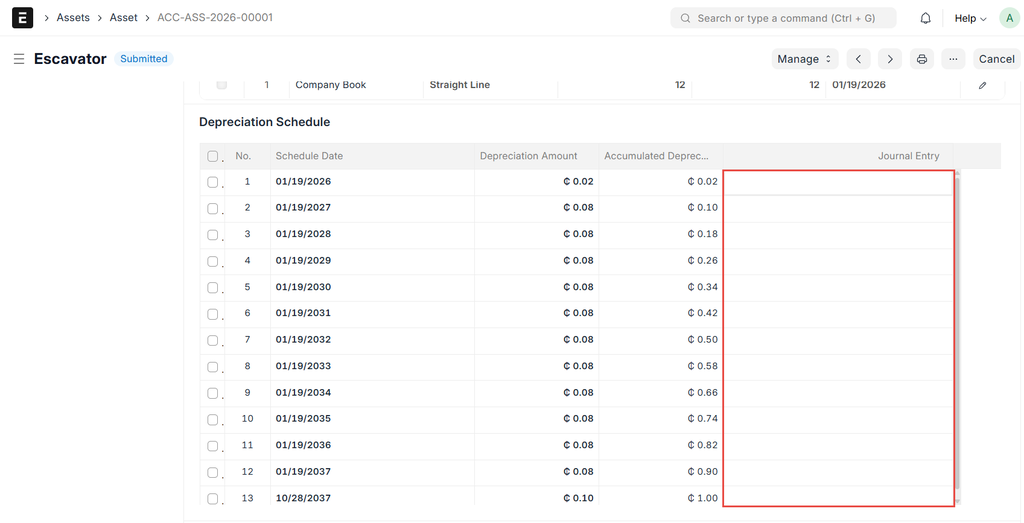
9. Asset Depreciation Posting
ERPNext automatically posts depreciation using Journal Entries based on the schedule.
To view:
- Open the Asset
- Scroll to Depreciation Schedule
- Click linked Journal Entries
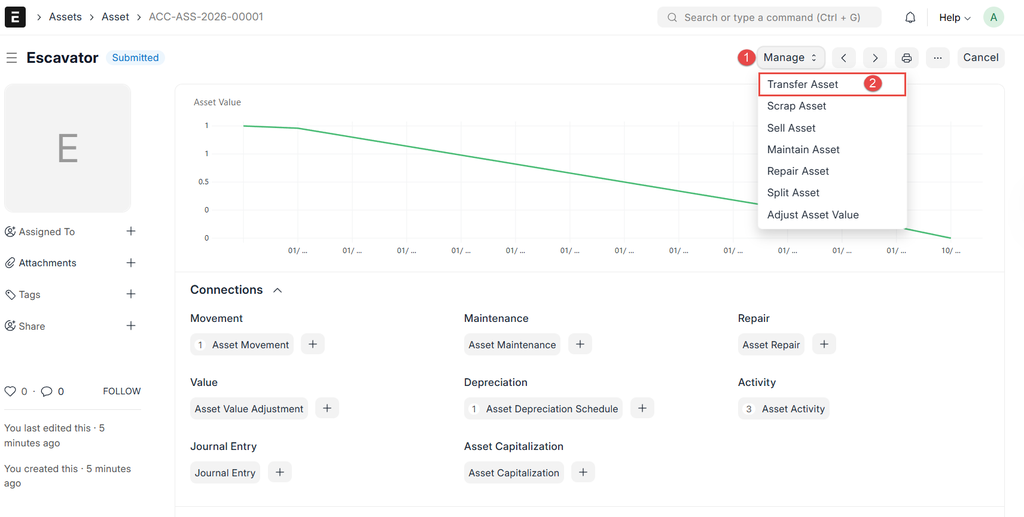
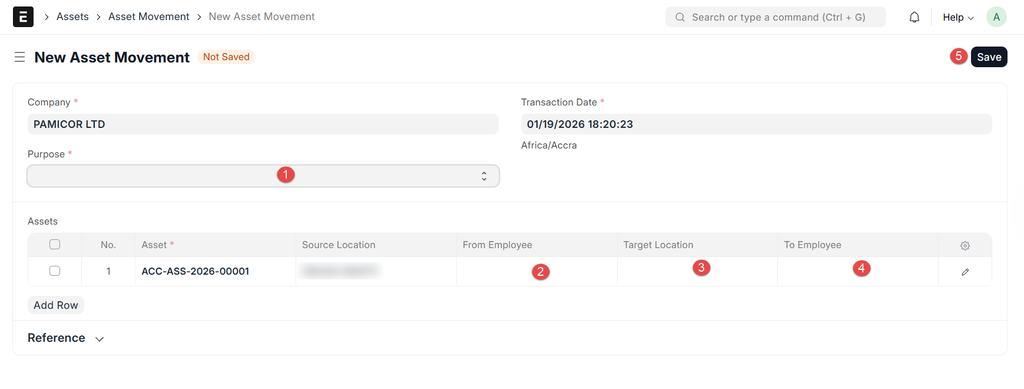
10. Asset Movement & Transfer (Optional)
Assets can be transferred between locations or custodians.
Steps:
- Open the Asset
- Click Transfer
- Update:
- Location
- Custodian
- Submit
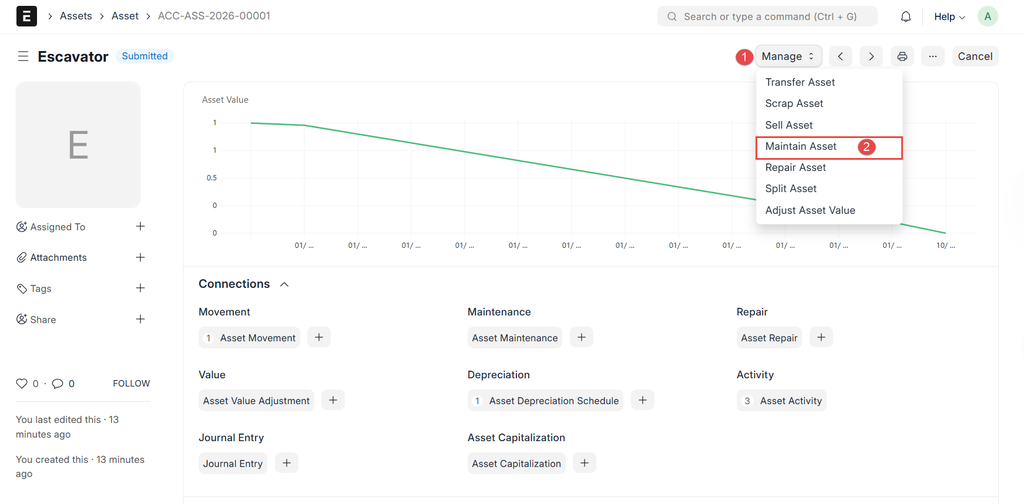
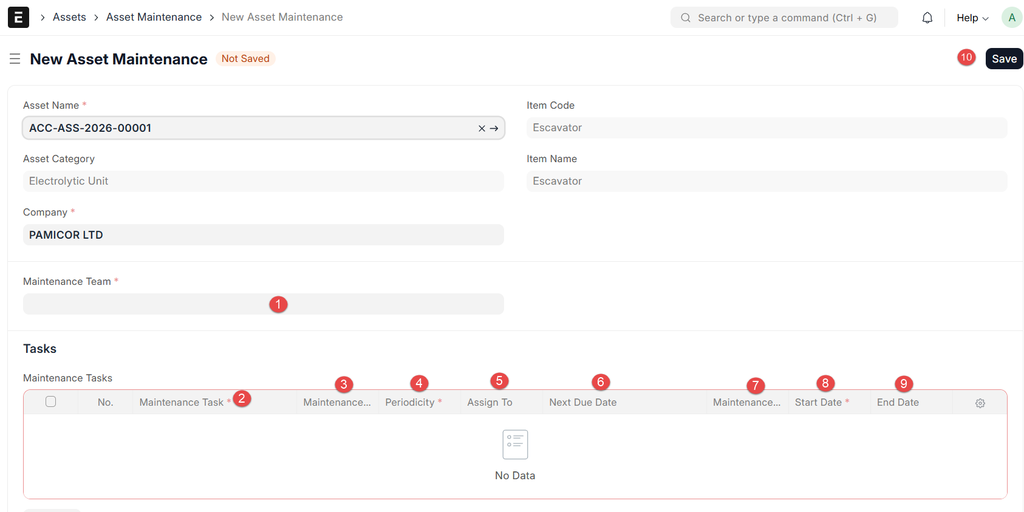
11. Asset Repair & Maintenance (Optional)
ERPNext allows linking maintenance and repair costs to assets.
- Use Maintenance Schedule
- Track costs via Expense Accounts
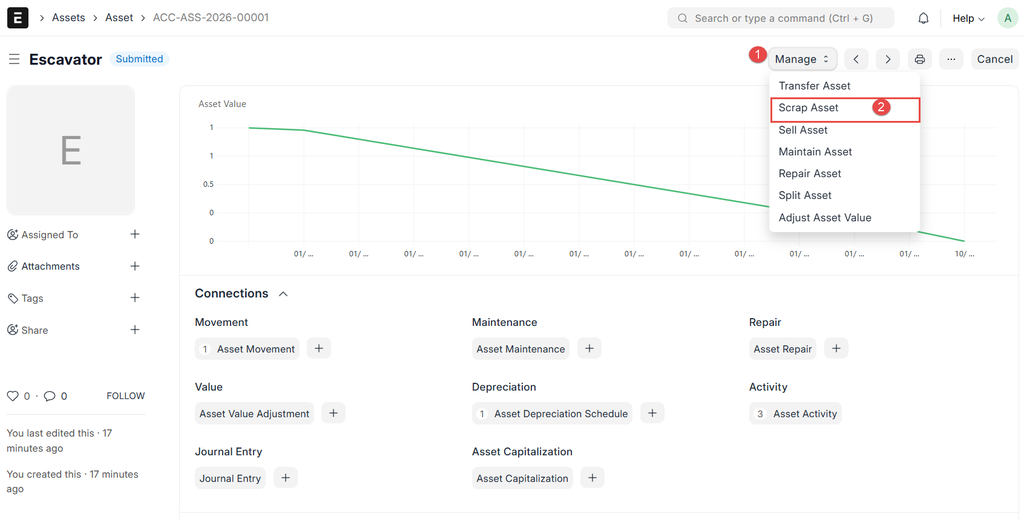
12. Asset Disposal / Scrapping
Steps:
- Open the Asset
- Click Scrap or Sell
- Enter disposal date and value
- Submit
ERPNext will automatically:
- Stop depreciation
- Post-disposal accounting entries
13. Reports Related to Assets
Useful reports include:
- Fixed Asset Register
- Depreciation Ledger
14. Best Practices
- Always use Asset Categories
- Prefer creating assets via Purchase Invoice
- Assign custodians for accountability
- Review depreciation schedules before submission
- Restrict asset modification permissions
15. Common Issues & Troubleshooting
| Issue | Cause | Solution |
| Asset not depreciating | Not submitted | Submit asset |
| Wrong depreciation | Category setup | Review Asset Category |
| Duplicate assets | Manual + Invoice | Use one method only |
16. Conclusion
ERPNext’s Asset module offers comprehensive lifecycle management of fixed assets, encompassing acquisition, use, and disposal. Proper setup ensures accurate financial reporting and compliance.
No comments yet. Login to start a new discussion Start a new discussion